top of page

Planning & production
Reference Boards
The reference boards allow me to gather relevant images of the assets I am to create for this project, The assets help build the overall scene however I've put some different iterations of some of the assets as it shows the many different designs I could possibly pick.


Asset list
Below is a cleaner list of the assets I will look at making for this FMP I will rank these assets from most important to least important in a priority assets section as I need to remember I only have so much time and focusing on the key elements of the blacksmith is more important.
Furnace
Katana
Japanese Bellow box
Quenching Trough
Anvil
Liquid clay container
Hammer
Weapon stand
Tables
Windows
Ceiling supports
Polishing stones
Floor
Walls
Ceiling
Kunai
Priority Assets
The priority asset list is to show what assets are a higher priority over others as I want to focus my time on what's more important in this scene over focusing on assets that wouldn't be overly necessary. The assets at the top are the more important assets then going down those will be the less important.
Floor
Walls
Ceiling
Ceiling supports
Furnace
Japanese Bellow box
Sharpening stones/polishing stones
Quenching Trough
Katana
Weapon stand
Liquid clay container
Kunai
anvil
Table
Window
Hammer
Characters Concept Design
Even though I plan to make this scene Fist person I would still like to design some characters In hero forge to show How if I were to ever make a fully playable game, having some concepts of characters based of my theme would help paint a picture of the world I'm creating.
Civilian and Blacksmith attire

Samurai Attire

Woman Samurai Kimono Attire

Concept Art
While looking at various ways to plan out my production I decided to create come concept art of what my scene could look like but also the weapons I intend to create. The concept art did take me some time to complete as I wanted to gathered images to further cement my ideas. For the concept art I used a software called Kirta, The image below showcases the scene I created within Maya the scene was based of one of the references I gathered and it allowed me to make a few changes but also get an idea about how much space would this forge have. The models I will make I do intend to look different in some aspects but I am happy with the work I managed to complete.
The Katana concept art I'm a bit 50/50 on as I struggled to find good resolution photos to properly design the blade section of the weapon however even with that issue I still managed to get two drawings completed one of the sword out of its sheath and the other within. I may not model a sheath for the katana but it is always helpful to still do something relating to it as I may have the time to model one. The image of the Katana unsheathed has a minor issue in that the blade don't match the actual hilt and handle but It did give me something to work with when looking at possible design choices moving forward. The sheath I drew looks very plain however I would add a nice pattern similar to those seen on real sheath used for katanas.
Due to the Kunai's basic design having a detailed drawing of it is quite difficult, when it comes to the modelling side of the project what I may do it model both Kunai's shown below, the reason for this is that I what to show some uniqueness in my work. The first Kunai on the left is one from real life and the one on the right is taken from the Anime Naruto.
Scene concept art
Katana Concept Art

Kunai concept art

Software's That Will be Used
Krita
Pure ref
Maya
Unreal Engine
Substance Painter
Only one of these software's I haven't used before and that would be Substance painter as it was only recently made available. However I'm confident in my skills with the others. I will be using Krita for concept art and the main things I will be making art of are the weapons and the overall scene as I want to give myself enough time to continue doing research and production so I'm limiting the concept art to things that are more eye catching. Pure ref was used for the reference boards as it allowed me to gather a wide range of images without worrying about running out of space. Maya is the software that I'll be making all my assets in as its the only modelling software I'm comfortable using and its the only one I've had the greatest amount of time using. I will use unreal to build my scene as well as light it as you cant really do that within Maya, lastly substance painter I've had little time on this however this software allows me to texture assets ore efficiently then using Photoshop so I'm going to give myself some time to look up tutorial's and etc to learn how to use it correctly.
Modelling
Over the course of the modelling I will be taking screenshots and writing up what it is I am doing for each assets, I.e. what tools I used to create them. I will start off with the more easy assets as I want to build up my confidence after not using Maya is quite some time so that when it comes to making some of the more challenging assets I wont struggle as much or waste time.
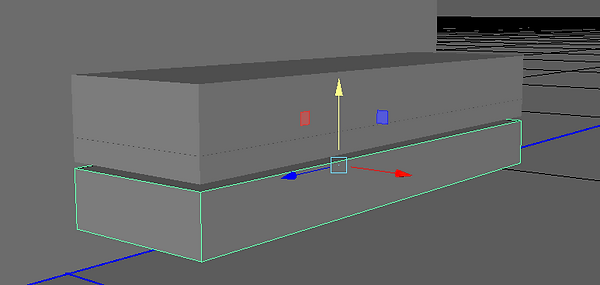
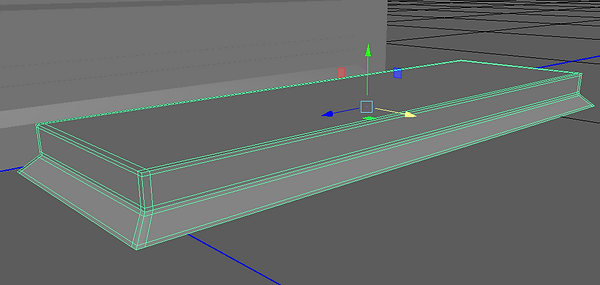
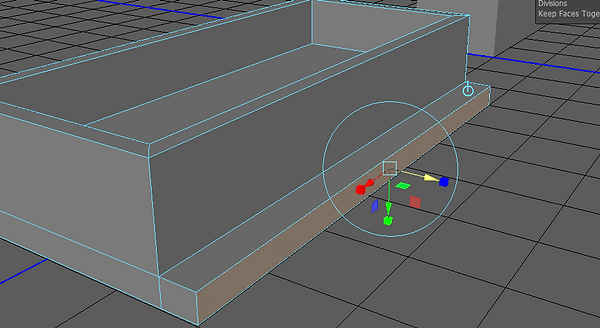
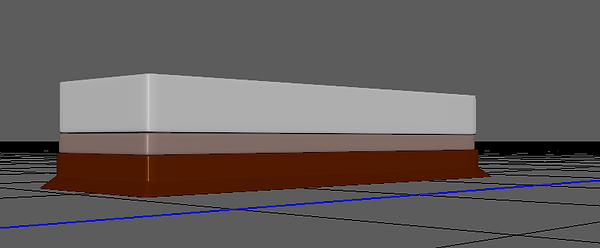
Quenching Trough
For my first asset to model I chose to make the Quenching trough first due its simplicity and basic design. Before modelling I made a quick prototype of the quench to get an initial idea on how I was going to create this asset and I found it quite helpful as I had a better Idea of what tools to use for its modelling stage.
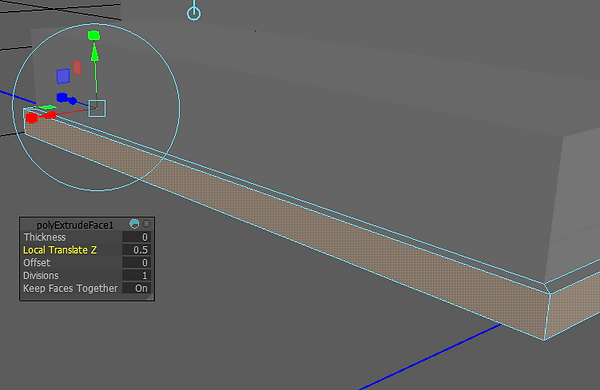
In Maya I started the model off using the Polygon cube as the quench has a cuboid shape so using this shape was the most realistic option when compared to the cylinder or something else. After using the cube I edited its general shape changing it to more of a rectangular design using the R tool within Maya, from there I used the face to to select the top face of the rectangle. What I wanted to do with that face was offset the face a little so I could then extrude down creating the area you'd put the water into. I had to play around with both the offset and extrude to get the most accurate depth for the quench as I needed to make sure it wasn't too deep or so it wasn't deep enough. In the end I clicked on the model and pressed 4 on the keyboard, this allowed me to see the model in its edge format (no shape) so that I could use the vertex tool to properly make the depth of the quench just right.
Once the model was shaped properly I needed to give the inner sides of the quench a slight curve to them so I used the bevel tool to give that slight curve on the inside to make the model look more natural, I repeated this process for the top part of the model as it to had a curve design. The final stage of the model was making sure it could be smoothed, to accomplish this I manually added edge loops to areas around the model so that when it was smoothed it didn't turn into a ball or stereo looking thing. The Edge loops did take some time to do as I had to move some around so that areas weren't so tight and by doing this my model wouldn't pinch in its corners.
Quenching trough Prototype

Quenching Trough Modelling Process


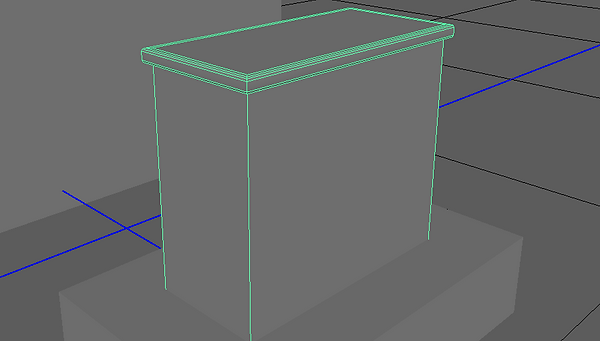
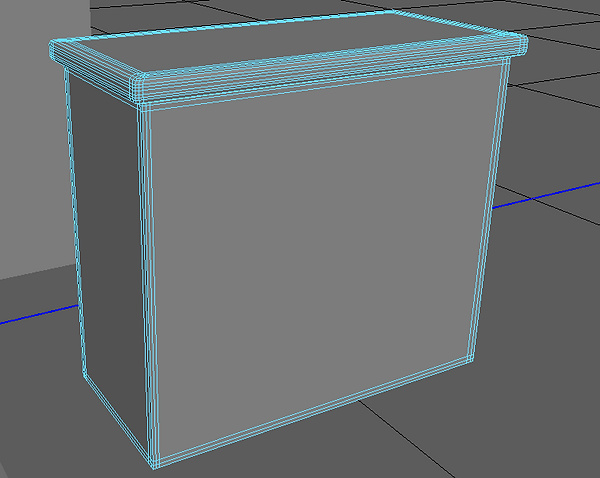
Sharpening Stones and stand
For the Sharpening stones the base shape I used for it was the cube and its reasoning is basically the same as the quench, the stones and base share a cube like design so the cube is the best shape to use. I didn't make a prototype for this asset as I didn't really see the point as the model its self isn't really difficult and it also has a basic design, the prototype would look the same as what I've produced so that's why I didn't make prototype of it.
At the beginning of the modelling process I did the same thing I did with the Quench as I used the R tool to edit the shape and size of the poly cube, turning it into more of a rectangular block. Due to my reference image having two block on top of each other once I got the shape into the size I wanted I held shift and clones the rectangle to create the other block. Now this black needed to be smaller then the one on top so again I used the R tool to make the second rectangle more flat. While lining the two blocks up I made sure to leave a little gap so it could be obvious that they were two separate objects, after I finished working on the blocks I began to make the Stand they would rest on.
The stand took me some time to make as I didn't quite know how I was going to give it certain curves and bends. At the beginning I cloned one of the rectangles and made it bigger using the R tool, this was done so that I could show how there is a little bit of difference in terms of size as I wanted to tell the objects apart. From here I used extrude on the bottom of the stand to create the part of the stand that sticks out, this was a difficult thing to do as every time I tied to create the bottom of the stand it kept breaking and glitching. I cant remember exactly what I did which got the model to work but I believe I used the bevel tool and gave the stand a certain fraction and segment to stop it from breaking.
Once all the models were created I began to add edge loops using the Insert edge loop tool so that they could be smoothed without an issue, the two stones used the same process as that had the same shape so I just replicated what I did on the first one when doing the second. The stand took a bit more time to add edge loops to due to its shape I need to make sure the loops added weren't too tight as they then caused issues when I would hit 3 to smooth the shape. When I finally got all the edge loops placed in the right areas It smoothed perfectly and I did make sure to give it a look over to see if the model was pinching in the corners and thankfully I was completely fine.


Anvil
The next assets to create was an anvil, after doing some research and reference gathering it seemed that anvils that fit into this time shared a basic rectangle design with the top of the anvil being curved outwards a little. I knew this would look basic and a bit bland however I wanted to keep to the setting so I went for the more basic design. The prototype I made of the asset lacked the top curve as I wanted to show a distinct difference between the two models.
At the beginning I modelled the stand the anvil is Placed on as It has a very basic design but I also wanted to build the anvil of the stand. The anvil did take some tinkering while I was making It as the top of the anvil has a slight curve. The anvils modelling process was quite simple as I cloned the stand and merely shrunk it so it would fit what my reference images depicted. once I had the correct size for the anvil I increased its height to showcase that it was a different object, I then used the face tool on the top face to allow me to extrude it up so I could then edit its side which would create the slight curve to the anvil.
Once I had the top of the anvil all sorted I began to play around with some of the tools while trying to get the curve, I believe I bevelled the sides of the top part of the anvil however I cant exactly remember as I was just testing multiple things to see what worked. After getting the specific amount of curve I wanted I then began to add edge loops so that I could then soften the assets. The stand was a simple edge loop job as I had a lot of practice since doing the sharpening stones, the anvil its self took a little longer as a few edge loops needed to be moved as they were a bit tight in areas.
Anvil prototype

Anvil modelling process


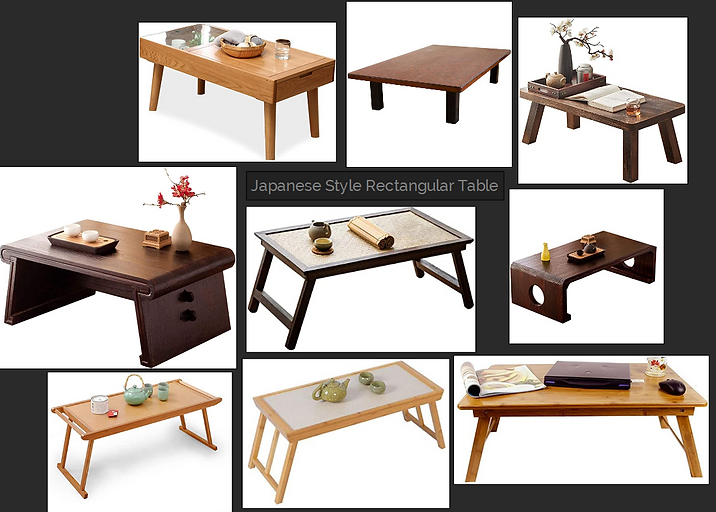
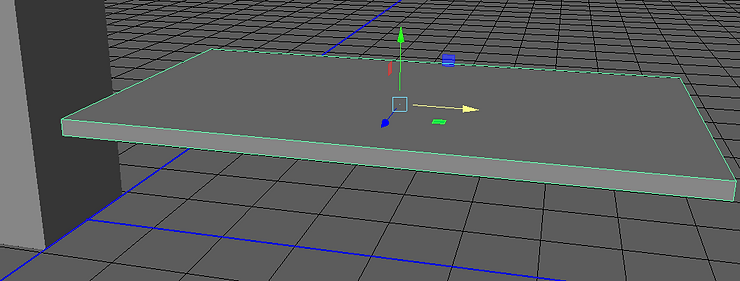
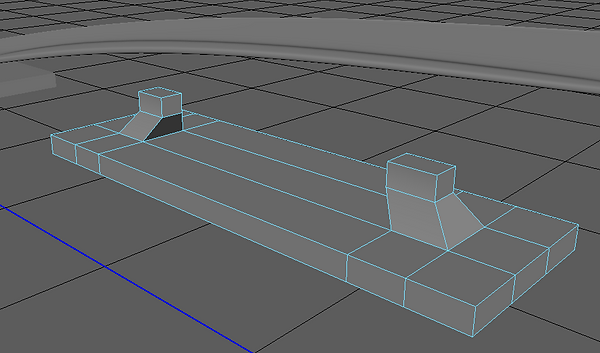
Table
The table has been the most fun asset to create so far as I had many different table designs to choose from but I decided to do a mix of two tables I had put on my reference board. One the prototype I went for a very basic version of the design so a standard rectangular shape with square legs however a few of those detail I changed for the better when modelling the actual model.
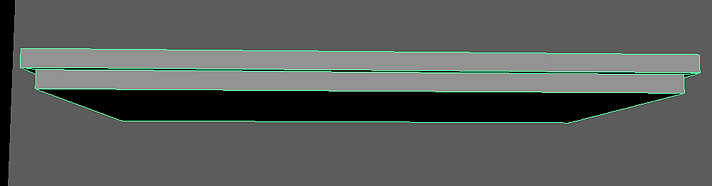
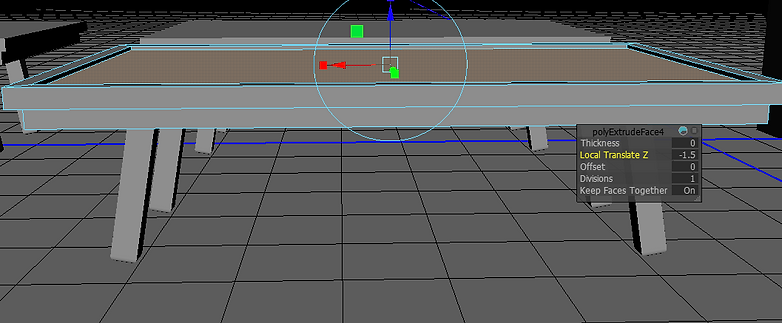
At the beginning of the real model I used the cube model to make the rectangular shape seen on the prototype, once I had the scale to the proportion I wanted I turned my focus to the underside face as I needed to create a small section below the main table top. To do this I first offset the underside face so that I could create a gap between the main top but to also show how it looks like the table is almost one thing not separate. After I got the underside offset and extruded i spent time deciding on how low to the ground it would be and in the end I looked closer at one of the reference images and decided to mimic its design, Once the table was somewhat completed I then moved on to the table legs for these I only needed to create one and then clone them three more times. While making the legs of the prototype I had a few different ideas I could do for the legs and in the end I decided to have the legs be slightly bent instead of straight. Most of the images I gathered had the tables with a more bent outward leg structure so I decide to try and replicate this design as I really liked how different it was compared to standard tables. For the legs I created quite large cuboids which I then thinned and for the feet I bevelled them to give the curved feet look id seen on the images, I did tweak them a little bit as I still wanted the table to look a little old not more modern.
The legs took a little bit of backward and forwards opinions as I didn't know what look I preferred but in the end I was set on one. once I made the first leg I simply cloned it and placed the remaining three in there own areas. I spent time ensuring the legs were all in an equal position, the final step of the modelling was back at the top of the table as I decided to have a slight indent in the table top. For the top I used the Offset on the top face to section off what I wanted to bring downwards, after some time looking at the references I ended up with a good design in my opinion. The final step for the table was adding the edge loops this was one of the more difficult assets to add loops to due to its design. I started on the legs first as they would be the most simple and in the end I managed to make the design even nicer once smoothed however the table top took me a lot longer. the core sides of the table were quite easy but I knew I needed to notice any changes so I would frequently switch between smoothed and regular to properly add the edge loops, The main issue I face was with the inward section on the top of the table as it would pinch in the corners, to get round this I added a few loops to the sides of that section. It still pinches but you have to get very close to the assets to notice.
Table prototype
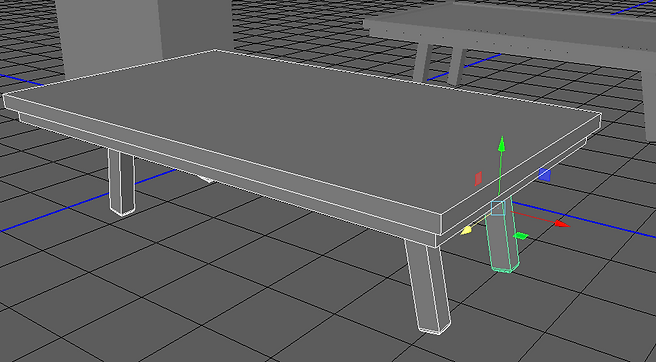
Table modelling process


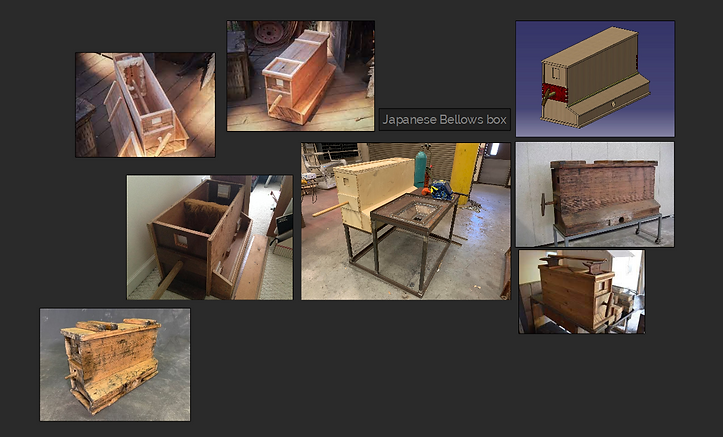
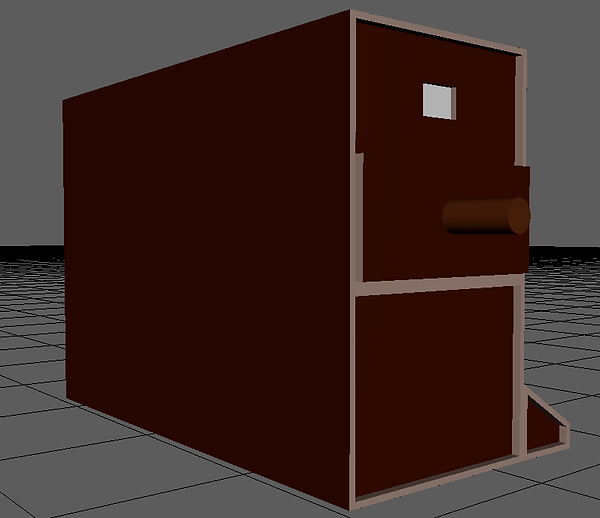
Bellow Box
The bellow box was a very difficult asset to attempt for this project sue to its different shapes and etc. I definitely wanted to give up while making it however I tried my best and created something that somewhat resembles the references I had gathered, The prototype and the fully made model share a lot of same making elements as I didn't particularly know how I was going to make this asset.
I began the bellow box using the default cube then making it bigger, I wanted to make sure I had the correct size and width of the box and once I had the shape the way I wanted it I began to extrude the cube and make three more layers on top of the base which gave me the bellow boxes size. I then created the little part of the box that come out to the side at the bottom, being honest I don't remember exactly what I did to get that but I can remember it being a major pain. As for the rest of the model I am afraid I cant remember how it all came together, much of this was an experiment seeing what worked and what didn't so I apologise for not being more helpful.
Bellow Box prototype
Bellow box modelling process


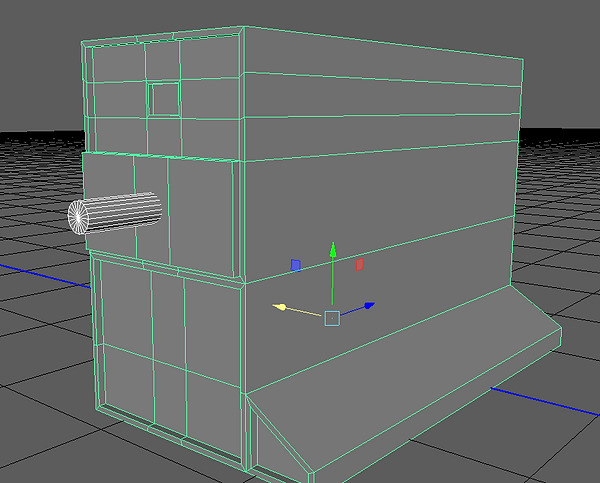
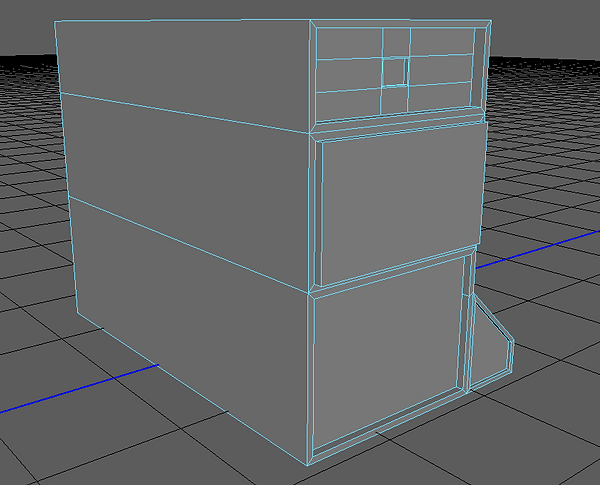
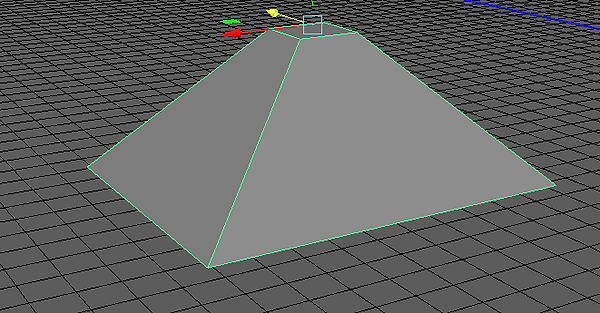
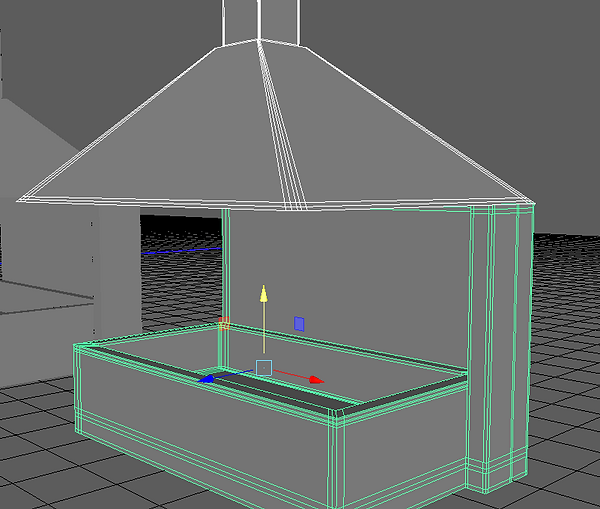
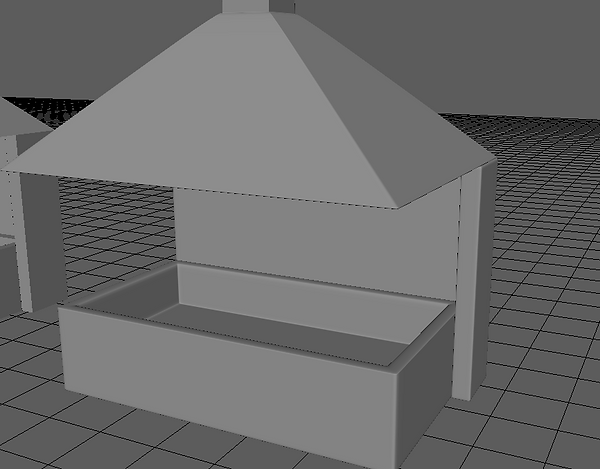
Furnace
The furnace was a fun model to create in my opinion and it wasn't as difficult as I first imagined it would be but I still took my time with it as I didn't want to run the risk of a software crash, At the beginning I started off creating a similar shape to the quench I followed the same steps I followed for the quench and once I had the container like shape as seen below that's were I started to change how I modelled. Once the Furnace had its initial shape I began to make the wall that surrounds the container, I did this by adding an edge loop near the bottom of the asset and from here I used the face tool and extruded the face out so that I could then make the wall. to make the wall higher and when adding the parts that curve around the container it is literally the same steps I did for the back wall face tool then Extrude.
The top part of the furnace was a little tricky to make as I didn't quite know how to approach making the furnace top, in the end I used the default cube made it quite big as the top is quite big and from hear I used the vertex tool to select the top vertices and from here I used the R tool to bring them in to create a pyramid shape however instead of a point at the to I used the W tool to move the top part down so that it would be a square. I then put the top on the furnace to sort out its proportions and make it fit the furnace without looking like it didn't belong there. Once I had the proportions set I then cloned the asset and used the face tool on the face underneath, for this process I used extrude to bring the face up but I also used the R tool and W tool so that the face wouldn't clip through the model. The last thing I did to the furnace was with the top square I decided to use extrude and have the little section where smoke can move through, after finishing the furnace I added edge loops to it so that if it was smoothed the model wouldn't look like a complete mess, there is one area that needs improving on the side however I wont be able to fix it at the moment as I still need to model some assets.


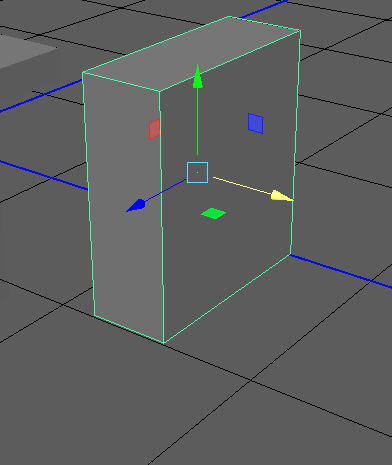
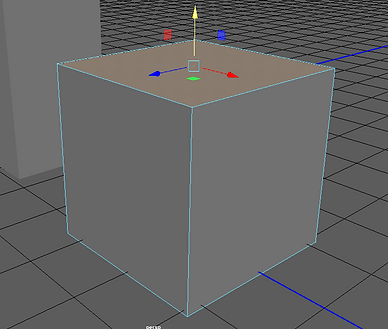
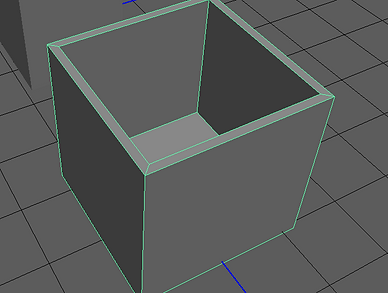
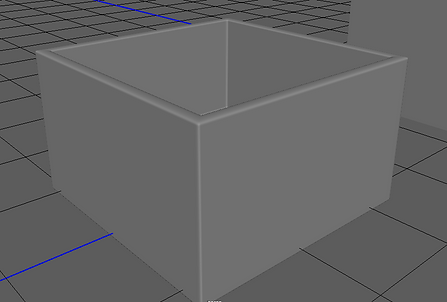
Liquid Clay container
After making the furnace I decided to model an unneeded asset but I realised that the room so far would look quite empty with what I had so far, The clay container I first saw in documentary and I decided to add it to one add more life to the scene but to also show how some swordsmiths used this to help them. I didn't make a prototype of this asset as I believed due to its basic look there wouldn't really be any change when I then came to modelling the real thing.
The modelling process for this item is very similar to the quench so this may be a bit of repetition. Like with all my assets I used the default cube as the base shape as the container in real life shared a cube design, from here I used the extrude offset on the top face so that I could eventually bring the top face down so that it created the container look I was after. Once I had the shape I wanted I then began to add edge loops to the model so that it retained its shape when smoothed, this assets doesn't require and unique details as it isn't an eye catcher so spending more time on it would be a waste.


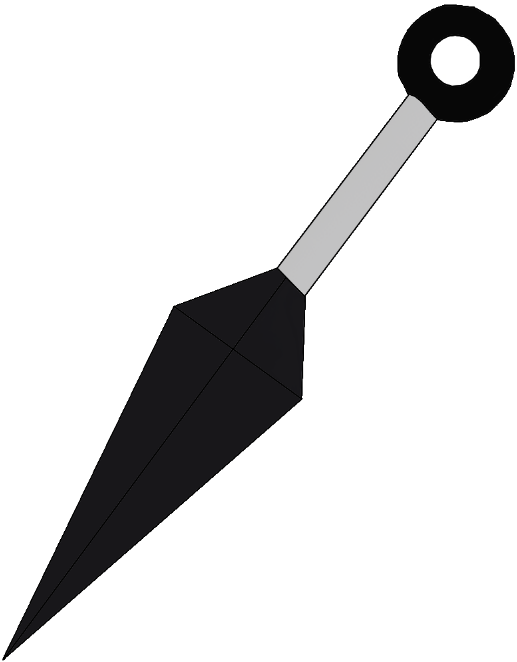
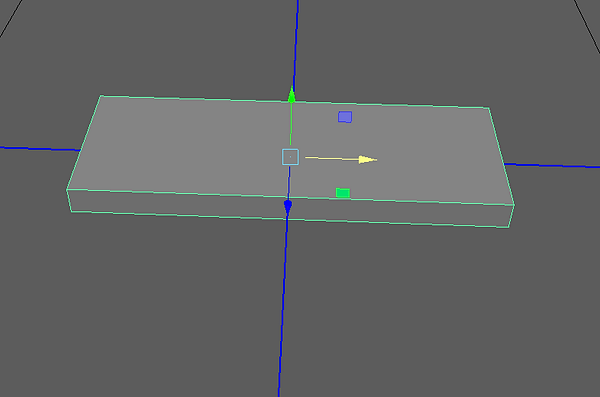
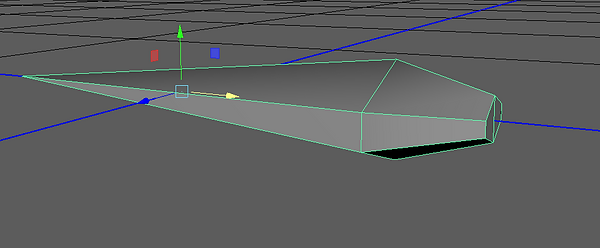
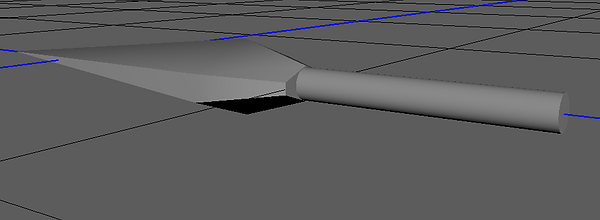
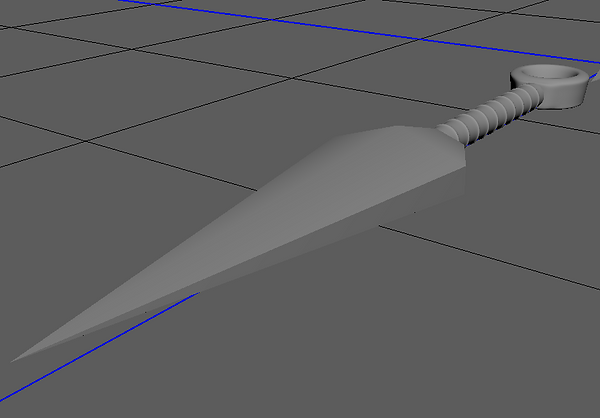
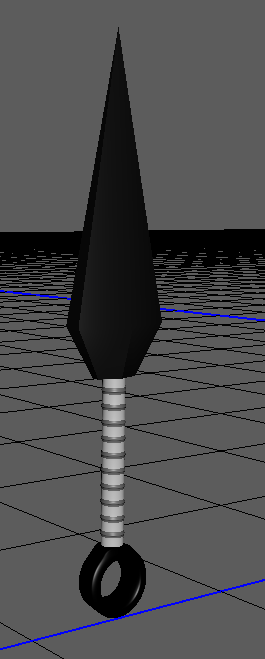
Kunai
The first Weapon of the scene and the assets I'm most impressed with so far, even though it looks basic I love its design but also the fact that it was a little bit of a pain to create.
I First created a very poor prototype of the Kunai as I needed to know what tools I'd need to use but also what shapes id use for the blade, handle and ring. Once I made the prototype I waited till I had a full day to model the actual asset as I wanted to spend a lot of time designing it to ensure it resembled what it looks like in real life.
When I started modelling the Kunai for real I experimented with a few tools such as the merge vertices, Bridge and etc to see what would give me the look I was after, I used a video on YouTube to help me model however the big problem was the video was about Blender not Maya so repeating some steps took a bit of time as I needed to find the right tools. During the process my software crashed due to the different things I was trying to do, so as a result I needed to start again but this time I knew what I was going to use and how.
For the model I used the cube poly as my base before making it into a rectangular shape, Once I had the shape I wanted I added an edge loop to the middle of the rectangle so that I could the use the vertices to and merge one side to the centre. On the other side I moved the middle vertices up and down to create the iconic design the kunai has, After this I then clicked on the two faces on the back and extruded them forward wand switching between the W tool and R tool as I wanted to replicate the bend bend by the handle.
For the handle itself I simply used a cylinder and added twenty edge loops so that I could extrude those areas up and create a grip like look to the Kunai, I spent some time seeing what thickness would work best and in the end I believe I chose 0.3. The circular part of the Kunai at the end was a bit more difficult to model as I didn't want the doughnut like shape it was. Its worth mentioning that while experimenting with this piece on the original Kunai my Maya to crashed. However thankfully that didn't occur this time round, With the torus I deleted some of its side faces and then bridged the remaining ones together to get a more handcuff like look and after multiple undo's and tests I found one that I liked.
Kunai Prototype

Kunai modelling process


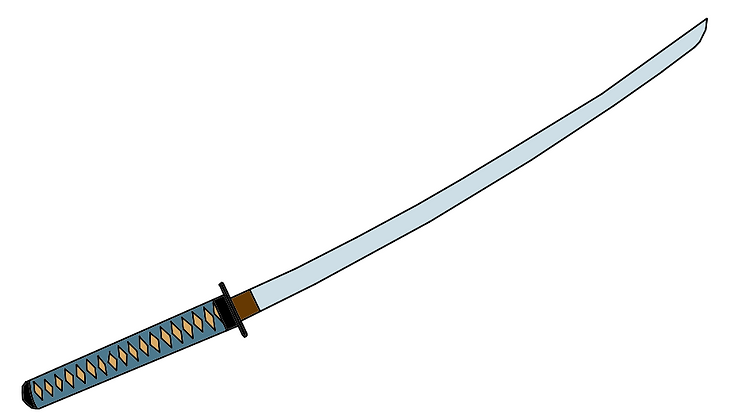
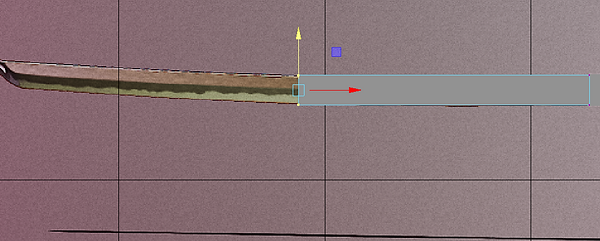
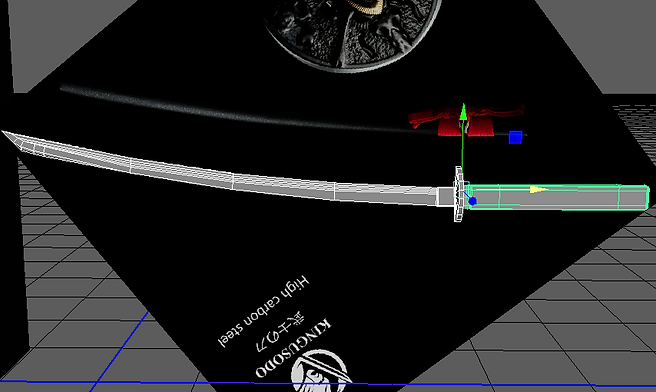
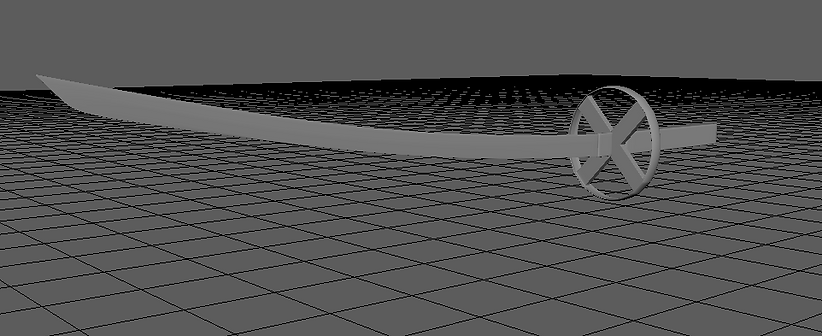
Katana
The katana was a prop I knew would take a lot of time but I will admit I didn't think it would take me as long as it did, The first attempt of the katana went somewhat badly as the weapon didn't really resemble the iconic blade and I was overall very disappointed with it.
Many of the tools I used were re used during the re-design however I did make the blades differently. I will also admit due to me one forgetting and two not thinking my re-design would work I didn't take many photos of the process of me making the new Katana. Firstly I will talk about the Handle, the handles process is very similar to the original design by that I mean I followed the process point for point.
For the handle I started off with the default cube and enlarged it to fit the handles shape and size, I did switch views so that I could make sure the handle wasn't to thick or thin as well. At the bottom of the handle I extrudes the back face so that I could then get a nice curved end for the handle, I used the bevel tool to help with this and Id say it went ok.
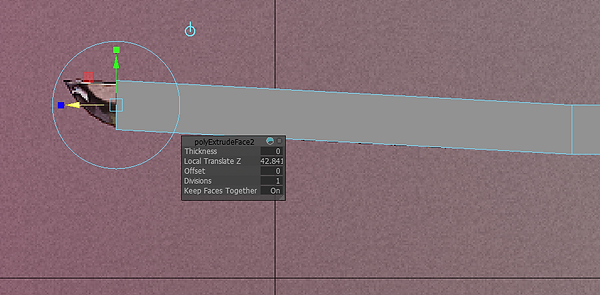
The ring section of the handle originally started of on the original as just a circle however for the re-design I decided to get rid of this basic and boring design for something more different and new, For the ring I offset the front and back faces and then extruded them in a little this was done so that the circle had an edge. From here this is were I tested different methods and ideas as I decided to delete both top and back faces so that I could then bridge each sides edges together to create two blank faces, I needed the blank faces as I was going to use the multi-cut tool to create my own edge loops. Unfortunately due to not taking many photos I don't really remember all of my steps however once I was finished with the ring I ended up with and X like middle section which I then tweaked and edited to give the shape a more samurai feel.
For the Katanas blade that was difficult, one the original design I went very wrong with the design and ended up with something terrible, due to this I decided to watch a few different YouTube tutorials to try and see how this blade was made and in the end I found one I was happy with the tutorial I followed was by Anoop TA . its worth mentioning I didn't do everything He did for the blade but the basic shape and design are similar.


Katana Re-design


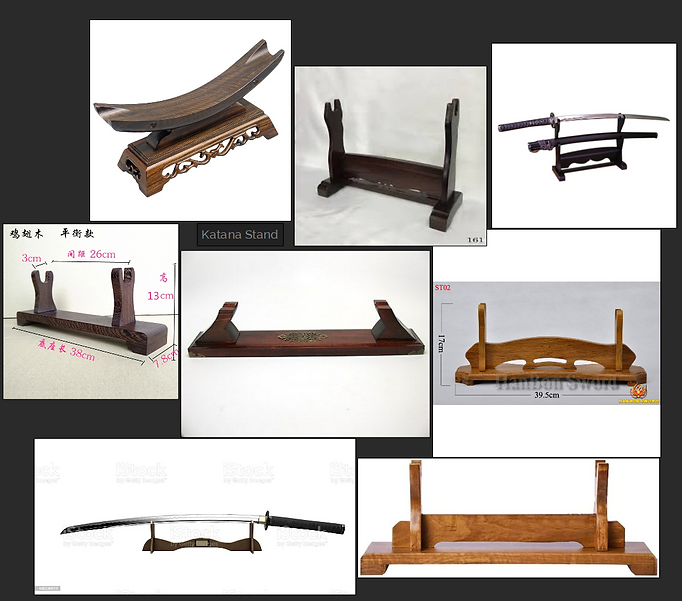
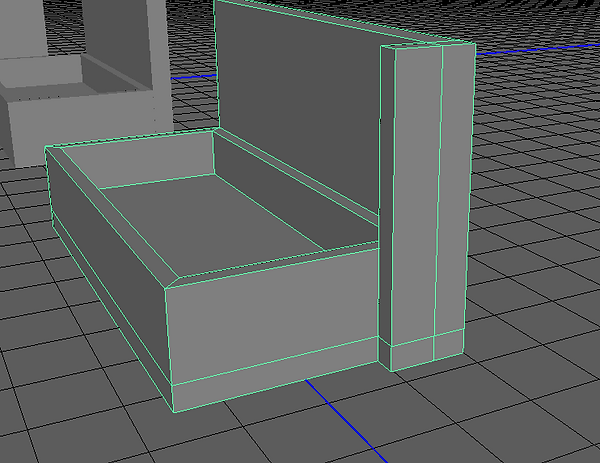
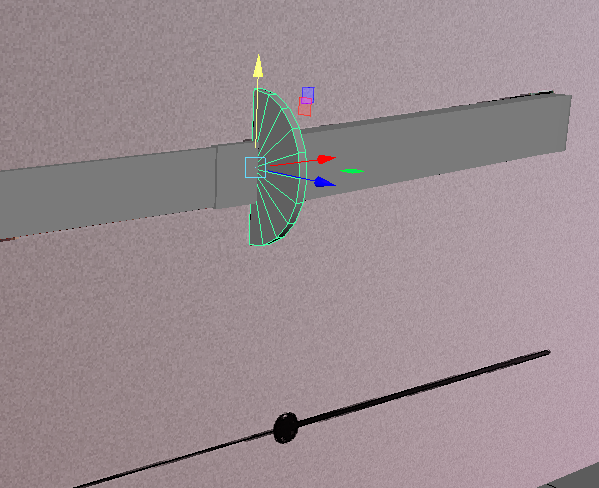
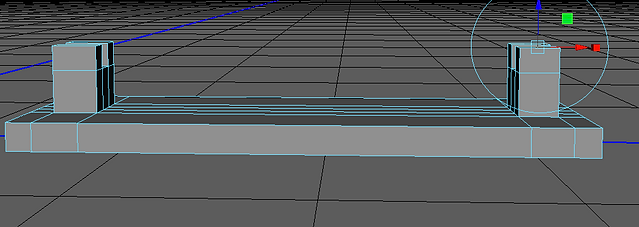
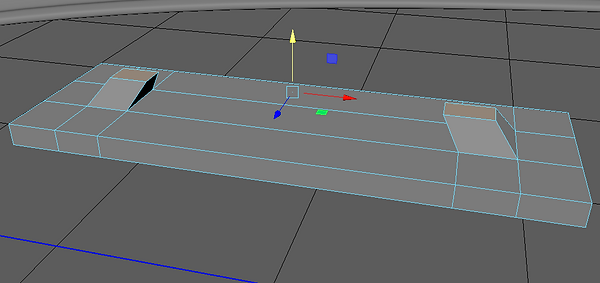
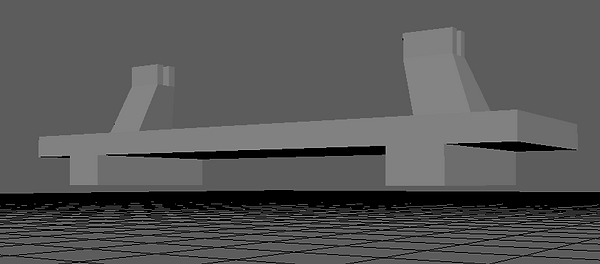
Katana Stand
My idea for the Katana was once I had modelled it I would make a katana stand to go with it I first made a prototype based of the references I had gathered but I wanted to change elements of its design, mainly the two points that would hold the sword.
Many of the steps I did for this model follow the same layouts I used for the table, furnace and etc. I created a rectangular shape similar to the one I created for the sharpening stones, this time however I added edge loops to the model so that I could create the two stand holder points. After using the edge tools to properly distance the loops I then selected both square faces so that I could create the holders, I switched between the W tool and R tool as I was trying to create a different shape for the holder. Once I had the design I wanted I made sure to leave the top a square shape so that I could then extrude that face up and then create the gap in between the holders, To create the gap I added two edge loops to the top square then removed then deleted the middle section, this resulted in me needing to add new faces an I did that by simply using the edge tool and bridging the edges to create new faces.
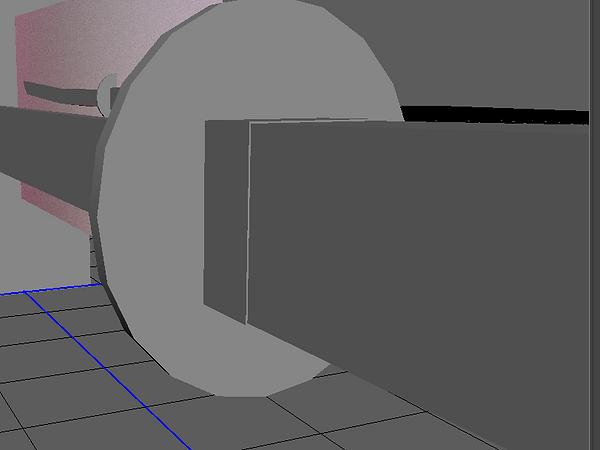
When the stand was somewhat done I moved the sword into position to see if It fit into the stand, hear I realised I needed to make some changes to the stand as It didn't properly meet the sword so I made the stand holders bigger so that the sword didn't clip into the base . After getting the sword to match the stand I began to add two legs to the bottom of the stand to give it a bit more detail, the legs were quite easy to make as I had already made the model so it could be smoothed with no issues so for the legs I simply clicked on all the faces underneath where the holders were and then extruded them down.
While looking at the model I thought something was missing so I decided to change things a little bit, I decided to clone the Katana and the stand and move one above and backwards a little so that I could create a display base for both stands and katanas. I did this because I wanted to make the model a bit cooler and more appealing. The final image below shows off the base I created for the stands to go and I used an almost stair like design to create the base.
Katana Stand Prototype
Katana Stand Modelling Process


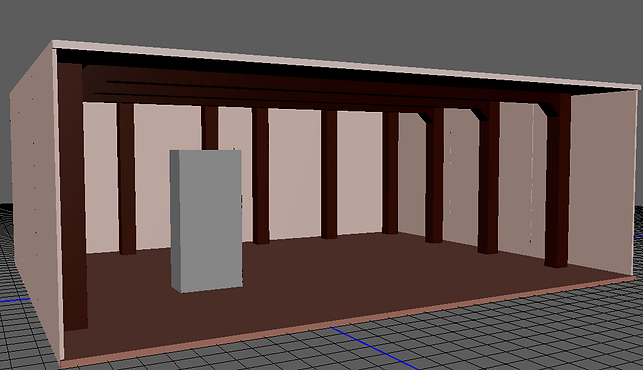
Blacksmith/forge Room design
The room design was were I would place all of my assets when they are all finished However due to time I may be unable to do this as some of the models I created took too much time and resulted in me not being able to properly design a better room but also put all the assets into unreal with textures.
Finished Assets
Below are screenshot of all my assets after I have added some materials to help them stand out a little more, Overall I am happy with the work I have done however, I do still think more could have been done to ensure my assets looked better for instance the bellow box in my opinion looks awful and could use a redesign and some of the other assets are broken in areas however I will use these mistakes to further my knowledge so that if I did this again I can improve upon my skills and maybe fix these mistakes.
The asset that stands out the most in my opinion is the Katan set as it looks really nice but after close inspection the blade isn't 100% as there is an issue but for now I am happy I managed to make it. The next step from here is to hopefully UV map my assets, texture them then put them assets into unreal and make my scene. If I can't do this I will either have the assets with basic colour materials or just the standard grey format which some artists have done before.


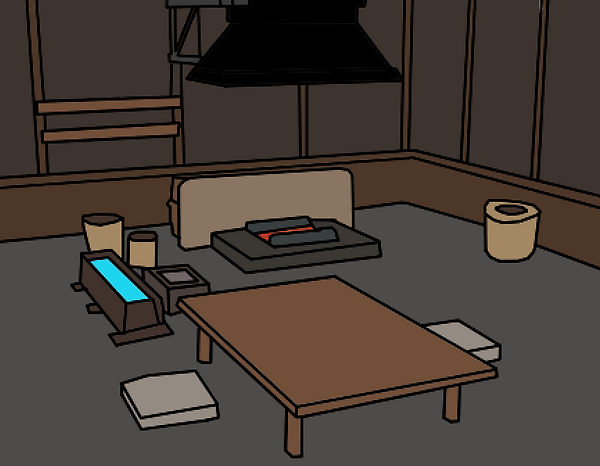
Scene within Unreal
After finishing all the assets I begun to export them out as FBX files to then Import into unreal. When moving everything to unreal I found some of the assets needed to be reshaped as they were either to small or just a little bit to big, this was a quick problem to resolve and I believe by making these changes the scene comes together a lot better then I originally thought. The only issue that remained was the huge amount of empty space What I will do is shrink the scene so that it looks more compact this allows me to have a scene that resembles a forge more effectively. If I also have more time I will also try to model a few extra assets just to help fill in the blanks a little bit.


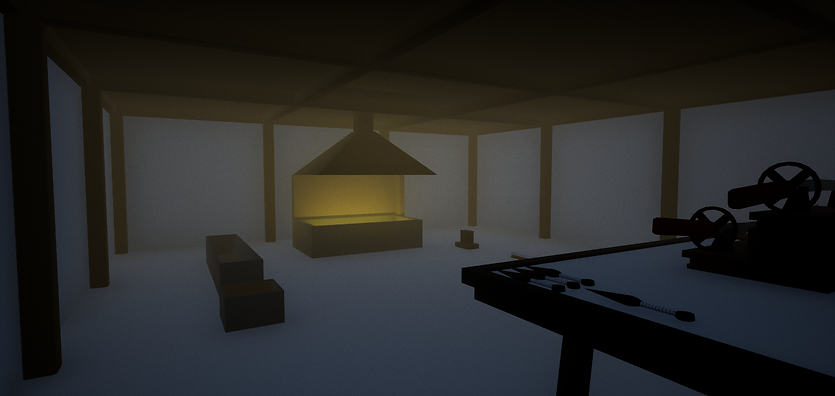
Unreal scene lighting
For my scene I wanted something quite dark as Japanese houses and buildings in ancient Japan weren't well lit so I wanted to have the lighting be shown through the furnace. I may look at modelling some Japanese themed lights just to help make the scene a little more clearer but I will have to work it into my schedule or I will try to find a way to model at home.
The images below show the scene with its new lighting however I am still tweaking it trying to find the lighting that I believe fits this project. After some playing around and testing things out I managed to add a foggy/smoky like effect to the scene which can also be seen in the images below and the reason I did this was because I wanted to display what the working conditions for a blacksmith is like, I do like how it turned out however I do need to make a few edits.


Extra assets
During days off or coming in on days I wasn't timetabled I managed to get a few more assets created for my scene just to help fill in some of the blank spaces, I added some materials to them to show what they'd look like however these material choices aren't final as Id hopefully add textures to them. If I cant get round to texturing then I will see what materials look best when they are added to unreal to decide what colours to give them.
Japanese Themed lights

Draw set

Hammer

Pots and wall shelf

Updated asset
Bellow box
Due to how much I didn't like my initial bellow box I decided to re model it and this time It was a lot more fun and easy to create as I knew were I'd gone wrong before. With some spare time I wanted to ensure this asset wasn't a broken mess like the original and after a few edits and attempts I finally managed to get the bellow box finished and in a way I was happy with.

UV Mapping Attempt
When I made the updated bellow box I decided to UV map the assets and see how long it would take me in the hopes that I could manage to UV the rest of my assets. While UV mapping the bellow box I faced quite a few issues as the vertices would overlap or my model would become an Ngon To solve the overlapping vertices, I used the Poly Count display which shows the vert, edge, faces, tri and UV count of an asset.
To check my asset I look at the vert count, if it reduces when I merge vertices, then I know no overlapping vertices exist. Then I Used the clean-up tool with faces, with more than 4 sides selected to check for Ngons. UV mapping this asset took quite a lot of time and I will be realistic and say that If I UV map all my assets I won't finish this project so I will have to drop the UV mapping and texturing side of this project.
This attempt was worth doing and I am glad I did it, even though I've lost a lot of time having the ability to show that I have tried to make the UV's for my assets is something. The image below is of the UV for the bellow box and after a few checks and edits I managed to create a fully functional UV map and yes its annoying I wont be able to make more but I'm glad now I know for next time that I need to have more time for this side of the project.
Japanese Bellow Box UV Map

Unreal Scene Edit
After adding some of the new assets I decided to make the scene smaller to make it look more accurate to Japanese forges I had seen online, below I have two images of some of the changes I made to the scene. I wont put the final scene images on this page as Id like to display them on my Final product page but with the scene being smaller it felt more realistic and I felt more impressed with it.


Ideas that Changed and got cut from the Project
Now that the production Is over and I am now moving onto the evaluation I think its right to mention the things that I changed but also things that didn't make it into the final product.
One of my main hopes for this project was to have my assets UV mapped and then textured, I wanted to do this as it would result in a highly detailed scene however due to lack of time I ended up scrapping the idea after the Bellow box attempt. The bellow box UV is perfect but It took a lot of time to make and the word TIME is key as if I had made more UV's I wouldn't have finished this project in time.
The storefront page- I debated on making the store frontpage as an extra piece for my work I thought it would show attention to detail and to an extent I was right but when I was making my scene in unreal engine I decided to scrap the idea so that I could then Use the extra time to ensure what I was creating didn't feel rushed.
Assets- I had toyed with the concept of having some windows and a door for my Unreal scene however while making the scene in unreal I was glad to a certain degree I didn't, the door and window weren't as vital to the project and they wouldn't draw people in so after checking the amount of time I had left and checking what still needed to be done I fully scrapped the idea to focus and finish what I already had.
Design- A few of my assets such as the Katana, katana stand, Bellow box and Kunai were all re designed. For the Katana, Katana stand and Kunai I made these changes during there production and I only mentioned a few of the change's in my write up as at the time I didn't see the need but I also couldn't remember the whole making process. Another reason I didn't go into the re-designs in much detail was because of how similar the re-designs were in terms of tools used, look and creation I didn't think it was a high priority. After the assets were all created and I began making my scene in Unreal I decided to add some extra assets just to fill it in a bit more and make it more lively, while doing this I noticed the original bellow box was a complete mess so I decided to make a new version of the assets but this time more accurate to the images and this time I would size it correctly.
bottom of page